vEsSeLs
How to:
Begin with a smooth flat surface. Place newspaper or cloth over the surface
to prevent the clay from sticking to your work surface. Spread the clay out by
patting it with your whole hand.
(Flipping the clay)
To flip the clay over - carefully hold top and
bottom of the clay with the palms of your hands. This will prevent the clay
from tearing while you are flipping it.
(Rolling out the clay)
To
help you roll your clay to an even thickness, place a yard stick on each side
and roll out until the clay is the same thickness as your yard stick.
(Cutting your slabs)
Use a ruler to help you cut a straight line. (Tip:
If you want a 90` corner - lay a piece of paper over the clay to show the 90'
corner.)
(Let clay firm-up)
After you cut out your bottom and sides, let them sit
until the clay is leather hard. For most clay's this will take about an hour.
(Score or Scratch the edges)
When your clay is leather hard use a needle or sharp
pencil to scratch the edges of the clay where the clay will be joined together.
A criss-cross pattern works well for this.
(Apply slip to edges)
Make some slip by watering down a small amount of clay until it
is the consistency of yogurt. Apply the slip to the areas you just scratched.
(Applying the slip)
Some potters use white vinegar instead of slip. I
have not had good experiences with vinegar. I find I get more cracking in my
pieces so I mainly use slip.
(Joining the pottery)
When placing the edges together slide the two
surfaces together in a slight back and forth motion to strengthen the bond
between the surfaces.
(When you have a good bond)
With experience you will get the feel of a good bond.
You will know you have a good bond when most of the slip has squeezed out
between the two surfaces being joined together. Also, the clay will not want
to slide back and forth easily.
(Add a coil to the inside seam)
To make the seem stronger place a coil in the corners of the piece. Gently
press the coil into the corner. Be careful not to break your corner away.
(Smoothing out the coil)
I like to use the top end of a brush to smooth out
the corners. Notice my other hand holding the corner so I don't break it away.
(The final touches - Corners)
I use a damp brush to smooth out all the corners so
the seams are no longer visible.
The final touches - Top edge)
To
smooth out the top edge use a wet paper towel and carefully slid the towel up
and down the length of each edge. This will round the edges so they will not
be sharp.
(Measuring for a top)
If you plan to make a lid measure the length and
width of the piece and write down the measurements. The piece will shrink as
it dries and you will need these measurements to make the lid.
(Finishing touch - Handles)
Rather than a lid I decided to place handles on each
side. The handles give the piece a focal point and makes it more interesting
to look at. For more information about how to attach handles, check out the
tutorial for making and attaching handles.
Once you have
completed your hand built slab piece, you will need to dry it thoroughly before
firing it. It is important to dry the piece slowly and evenly. Handles tend
to dry faster than the rest of the piece and that will lead to cracking. If
the piece dries too quickly it may crack or warp. A good way to dry your piece
is to cover it evenly with a newspaper tent this will allow the moisture to
escape slowly. The slower the piece dries the better.
http://www.jhpottery.com/tutorial/slab.html
Examples of vessels
http://www.middlemissart.com/Vessels%20gallery.htm
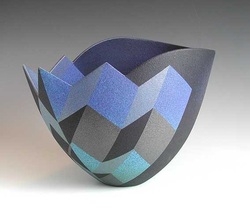
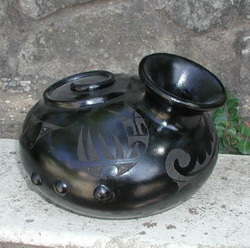
I like this one because the shape and pattern are unique.
http://www.shoprelish.com/Store/pc/Ten-piece-Ceramic-Vessel-Collection-Black-Slate-p181.htm
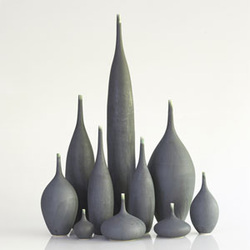
I like these because they are a variety of size and bulk.
http://www.skygrazer.com/polymerclay/gallery/vessels2.htm
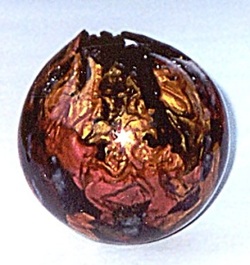
I love this one because of the shape and design.
http://www.createaframehandworks.com/Create-A-Frame_files/images/ceramics/image6.html
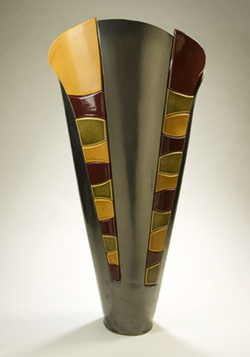
I like this one due to its unique structure.
http://www.greatgreenapple.com/folk_artists/mateo/index.shtml
I like this one because its something I wouldnt have thought to do. its very creative.
http://beachsideparadise.blogspot.com/2008/08/treasures-in-jars-of-clay.html
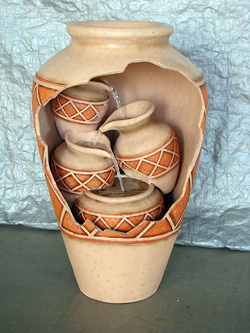
This one is my favorite because it looks so cool and the fountian is a smart idea.
http://alessionardi.com/page/3/
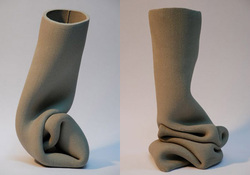
I really like these becasue even though theyre kind of ugly they are still cool and very unique.
http://primroseceramics.co.uk/gallery/smoked.php
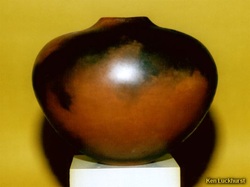
I like this one because it sort of reminds me of the dragon egg on Harry Potter, just sayin.
http://www.rhgallery.com/site/press.html
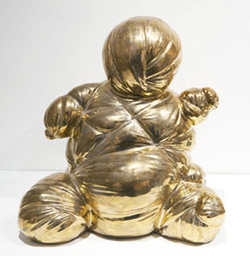
I really like this one because it was called Buddah and its kind of cute! I also love the metallic finish.
http://theaestheticelevator.com/category/art/artist-profile/page/2/

This one is awesome for obvious reasons, there is a face in the vase, hahah i made a rhyme. :)
rEfLeCtIoN (vEsSeLs)
1. I really like the texture and unfinished look to my
project.
2. I could have worked harder to get more done because
so far i only have one done.
3. my design is grungy and earthy which is my
room theme so its perfect.
4. my project is spherical and rough around the
edges.
5. rough and bumpy, I took slab and added it all around
randomly and it turned out really cool.
6. My second vessel
when its done will be a bottle and im going to smash it and paint different
stories in it, it will relate to life because sometimes when a person is broken
doesnt mean they arent beautiful.
7. Both my vessels were
planned to look a certain way at first but then didnt turn out the original
ways, I changed what I wanted with them after I got going.
8.
this was a fun project, but i felt pressured with the limited time.
rEfLeCtIoN (sCuLpTuReS)
1. a strong part of my project is its shape and meaning because its shaped like
hearts and it has quotes on it.
2. i would have leveled it from
the start because ive had to fix it twice.
3. my design is
three different sized hearts bonded together with meaningful quotes on
each.
4. my form is the hearts and i made it so i could hang
them on the wall.
5. I love quotes that actually mean something
and make you a stronger person, which they are.
6. I learned
that if i enjoy something i work harder on them.
7. my sculture
was planned and it turned out really good and im going to paint it but i dont
know what colors yet. I also wouldnt change it if i could.
